Filter tutorial
This page explains how to create, edit, and filters in OpenCRAVAT. For large analysis jobs, enable summary plots and variant tables by applying filters that will reduce the viewer to fewer than 100,000 variants. To follow along, open a completed job in the viewer by clicking the “Open Result Viewer” button on the Jobs tab. The viewer will open in a new tab in your internet browser.
The job will open to the Summary page, which provides an overview of the input file and which annotations were included in the job. Navigate to the filter options by clicking on the FILTER tab on the top of the page.
Filter tab Layout
The Filter tab is divided into three types of filters with several buttons on the bottom to test and apply filter settings. There are three sections on the Filter tab: Samples, Genes, and Variant Properties.
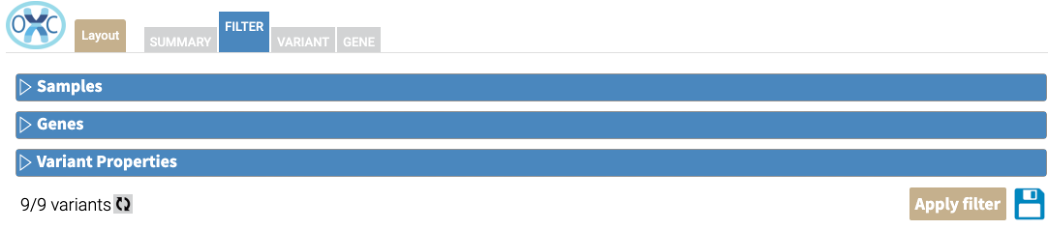
Along the bottom of the screen, there are four components:
Compone nt |
Purpose |
|---|---|
X/Y variant s |
Of the Y variants in this job, X of these variants meet the applied filters |
Refresh button |
Find the number of variants that match the selected filters |
Apply Filter button |
Apply the selected filters and generate summary plots |
Save button |
Save these filter settings for later use |
For large jobs it will be necessary to apply filters that reduce the number of variants below 100,000 variants.
The Apply Filter button will apply any selected filters, will update the count estimate, and apply these filters to the data on the Variant, Gene, and Summary tab.
The Refresh button can be used to more quickly update the number of variants that match the selected filter criteria, without applying the filters to the interface.
Sample Filters
In this section, variants within a particular sample can be included or excluded. To include variants in all samples, without filtering, leave these boxes unchecked. If the job does not include multiple samples or files, this section will not appear.

To include variants within a sample, click the checkbox one time. To exclude variants within a sample, click the checkbox a second time. With these checkboxes, variants can be filtered that meet complex rules such as mode of inheritance within members of a family.
Click the Clear button to clear all filters.
The Sample list button can be used for advanced analysis that includes several samples. Use the Sample list button to upload a file of sample names, which can be excluded or included using the checkboxes below.
File formatting for samples
For VCF-formatted files, samples should follow the current VCF specification.
For TSV-formatted input files, the samples identifiers should be placed in the column immediately after the alternate nucleotide.
chr2    112501307   +   C   A   s1    var001
chr14   104770363   +   T   A   s1    var002
chrX    71127984    +   A   G   s2    var003
chr14   91974629    +   T   G   s3    var004
chr12   57094662    +   G   T   s4    var005
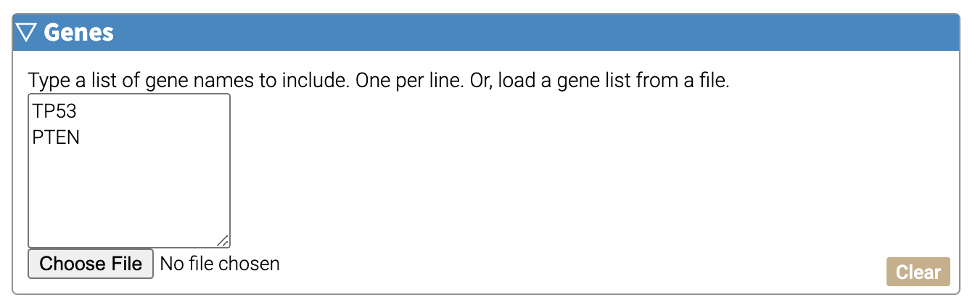
Gene Filters
Filter protein-coding variants that impact a one or more genes of interest with the Genes filter. In the browser, list one gene per line with the Hugo gene identifier. Alternatively, gene lists can be uploaded from a file with the ‘Choose File’ button. Click ‘Clear’ to clear the filter.
Variant Properties Filters
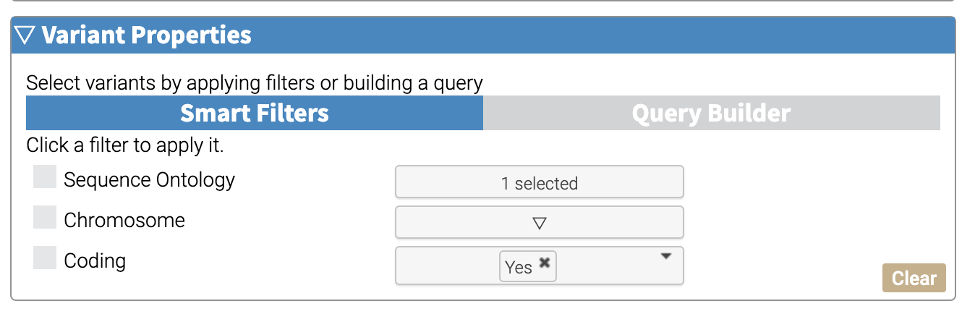
This section enables filters based upon variant-specific properties. There are two types of variant filters – Smart Filters and the Query Builder. Applied filters can include either Smart Filters or a Query Builder terms, but not both. To toggle the alternative option, click the name of the inactive filter selection (shown in grey).
Smart Filters - Simple filters for common operations.
These filters appear dynamically to reflect the annotations that are included in the analysis job. The screenshot below shows the three smart filters that are included with every job: Sequence Ontology, Chromosome, and Coding. These filters are joined with an AND operation. For example, selecting Chromosome 12 and clicking the Coding checkbox will return all coding variants in chromosome 12.
Many annotators have an included smart filter, such as allele frequency or predictive scores. When more than one allele frequency annotation is included, the smart filter applies filters based upon the maximum frequency among the included annotations. For predictive methods, smart filters allow users to find variants with a predictive score greater than or equal to the user-provided threshold.
Query Builder - Advanced query-based filters for in-depth analysis.
The Query Builder leverages the underlying sqlite3 database to filter variant characteristics based upon a series of rules. This section can accept dozens of different properties and leverages boolean logic and nested statements to maximize filter options.
To add a rule, click the + button.
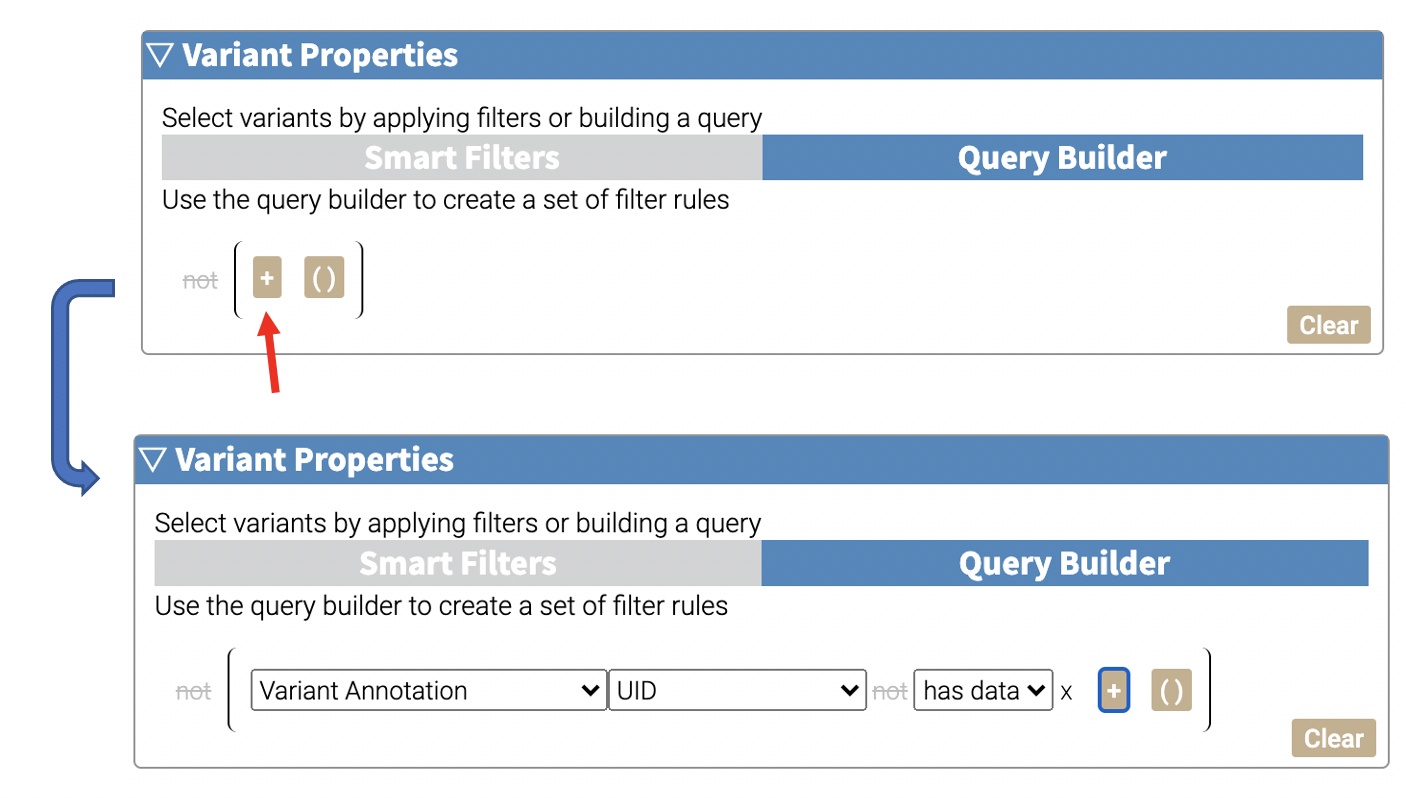
There are three dropdowns that will appear in each line. The first dropdown selects the annotation source, and the second dropdown selects the field of that annotation that will be used in the filter. The third dropdown allows customization of the filtering method, and will vary if the data is numerical or categorical.
The filter options for chromosome include:
Filter type |
Descript ion |
|---|---|
Has data |
Variants that have any annotati on for the selected annotato r |
Equals |
Variants whose annotati on exactly matches the search term |
Is empty |
Variants that do not have any annotati on for the selected annotato r |
Contains |
Variants whose annotati on contains the search term |
One of |
Variants with at least one of the selectio ns from the dropdown menu |
The not button in this line enables negation for this rule. Such as UID does NOT have data.
Saving filter files
In the graphical interface, each saved filter can be downloaded as a single json-formatted file. To save the filter, click the save button on the lower right. To download the saved filter, click the download button on the upper left-hand side of the screen, in the Saved Filters section.
Loading filter files
To upload a json-formatted filter file, click the upload button on the lower right-hand side, next to the save button. The filter settings in the graphical interface will change to match those specified in the designated filter file.