GUI usage
The web interface is started by running a local web server, then connecting it using a browser. Both these actions can be taken by running the following command in any command shell.
oc gui
This will start a python server in the shell it was run in. Closing the command line shell will shutdown the server.
Submitting Jobs
The submit page is divided into two sections. Jobs are submitted using the form on the left. Running and finished jobs can be viewed in the table on the right.
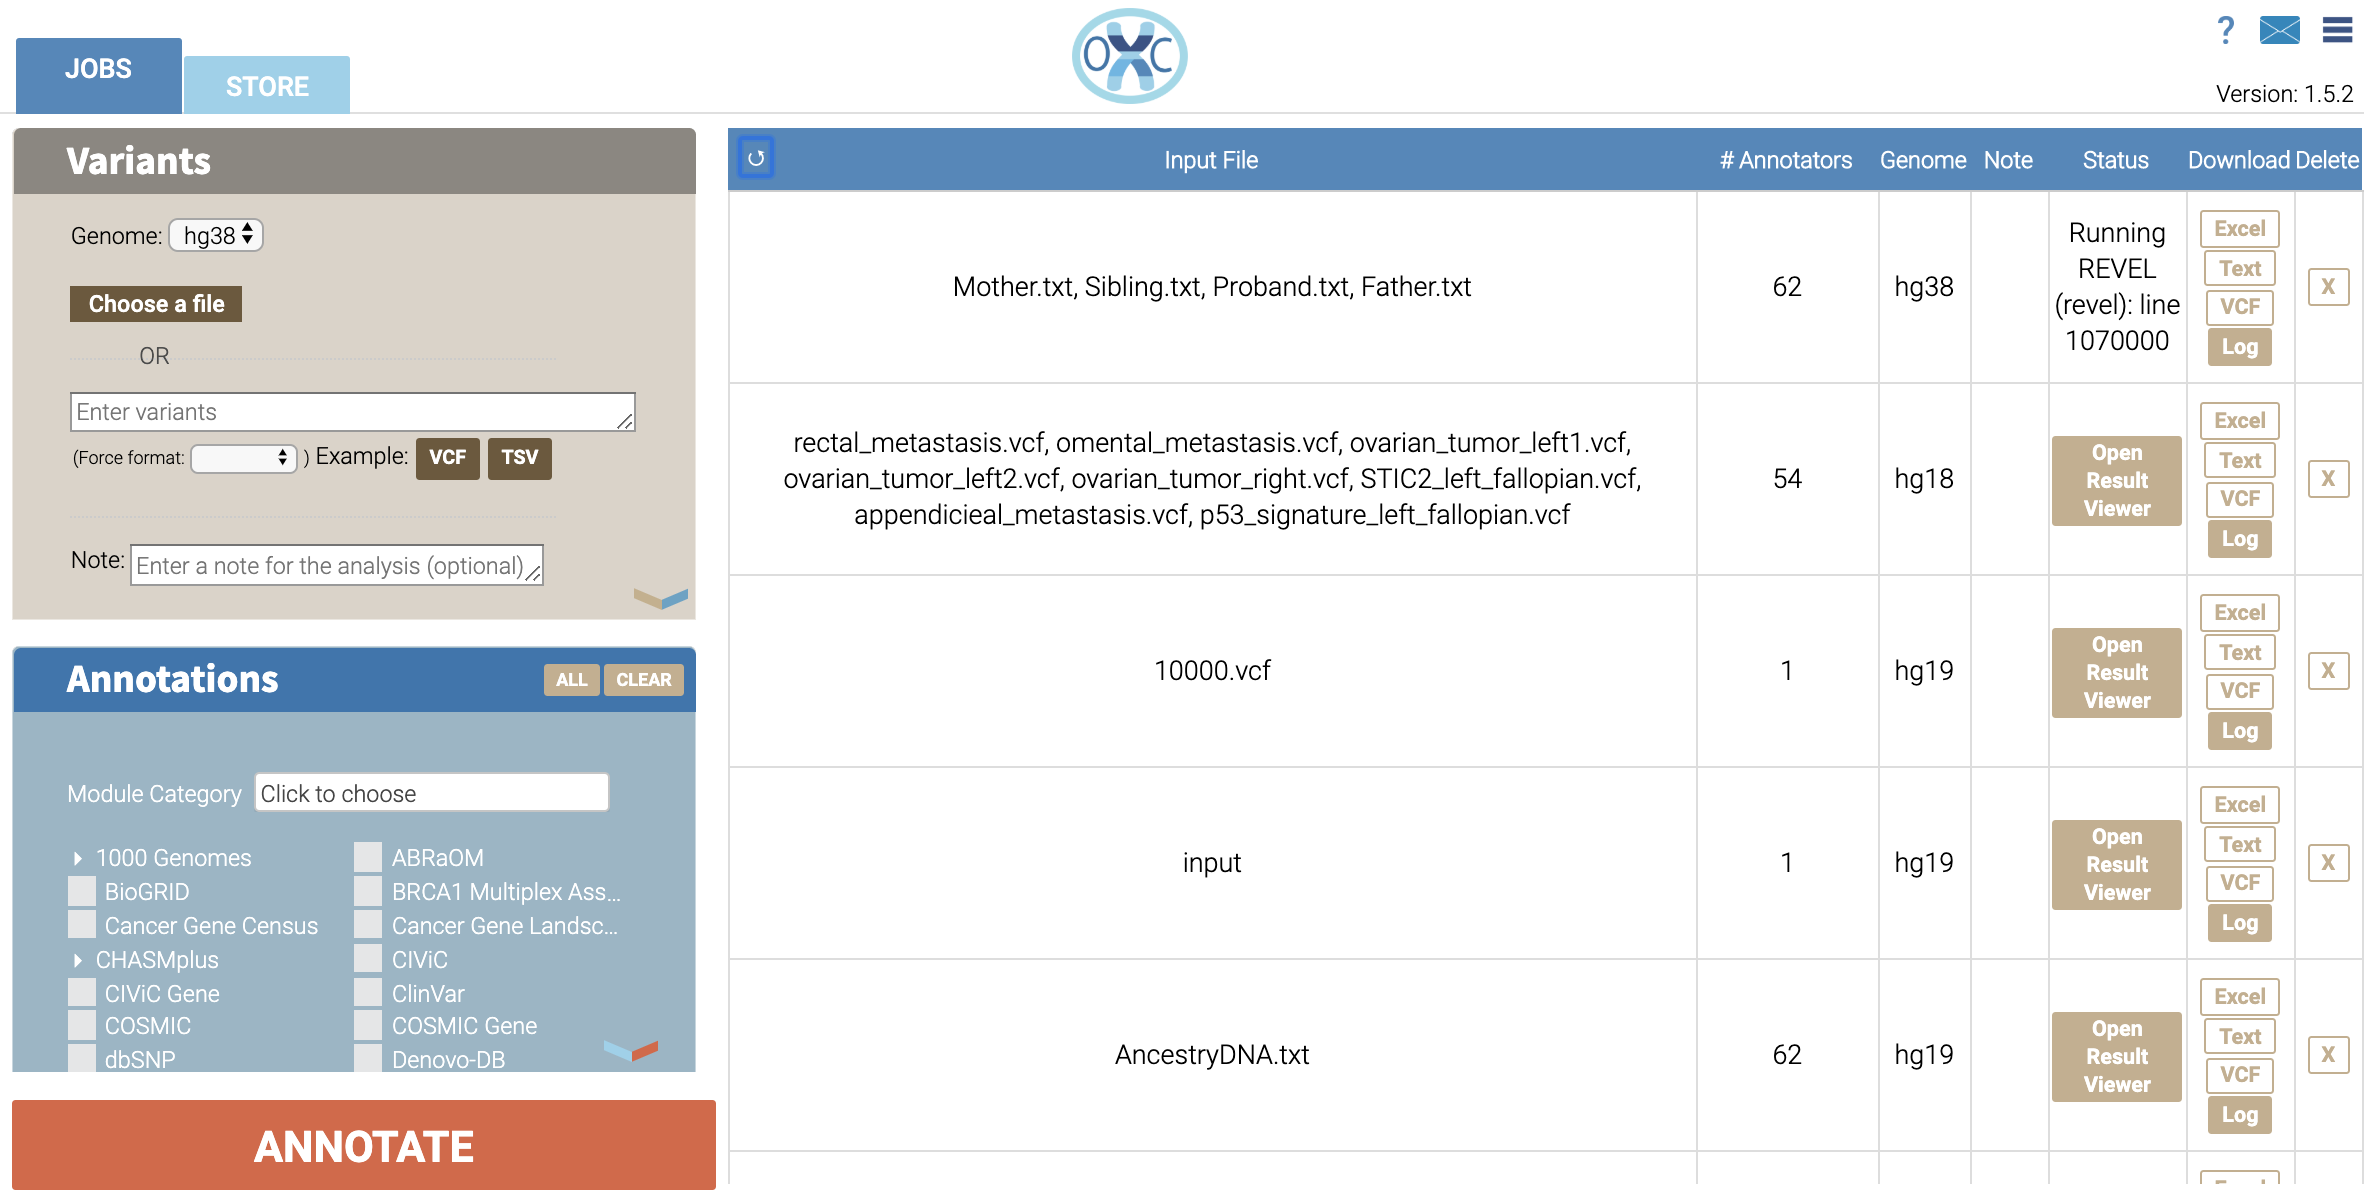
To submit a job, either upload a file, or input text which matches a supported file format. Then, use the checkboxes below to select annotators, and which types of reports to run. If you are submiting variants in an assembly other than hg38, be sure to select the correct assembly at the top. When you have selected the right options, click the annotate button to submit the job.
After submission, a new row should appear at the top of the jobs table. The status column should say “Submitted”. As the job runs, you can click the refresh button to view the current status of all submitted jobs.
When a job is finished, launch the interactive web viewer in a new tab by clicking the “Open Result Viewer” button, or download different types of reports using the buttons in the “Download” column. If a report download button is red, that is because the report has not been generated yet. Click on the button to generate the report, then periodically refresh the table until it is finished.
Uploading multiple files
OpenCRAVAT can process more than one input file per job. Input files must be in the same format. The variants in each input file will be merged and each unique variant will be processed once.
To submit multiple files, click the upload file button as usual. Once the file select dialog box opens, hold down the Ctrl key (Command on mac) and select multiple files. Contiguous groups of files can be selected by holding down the Shift key and clicking on the first and last file in the group. When multiple files are selected, a list of selected files will appear below the file select button.
When multiple files are run, OpenCRAVAT will merge filenames and sample ids to track the source(s) of each variant. See here for a description of this process.
Managing Modules
The store tab of the OpenCRAVAT web interface contains controls for managing which modules are installed to OpenCRAVAT. By default, it will launch into a view of all available annotators in the OpenCRAVAT store.
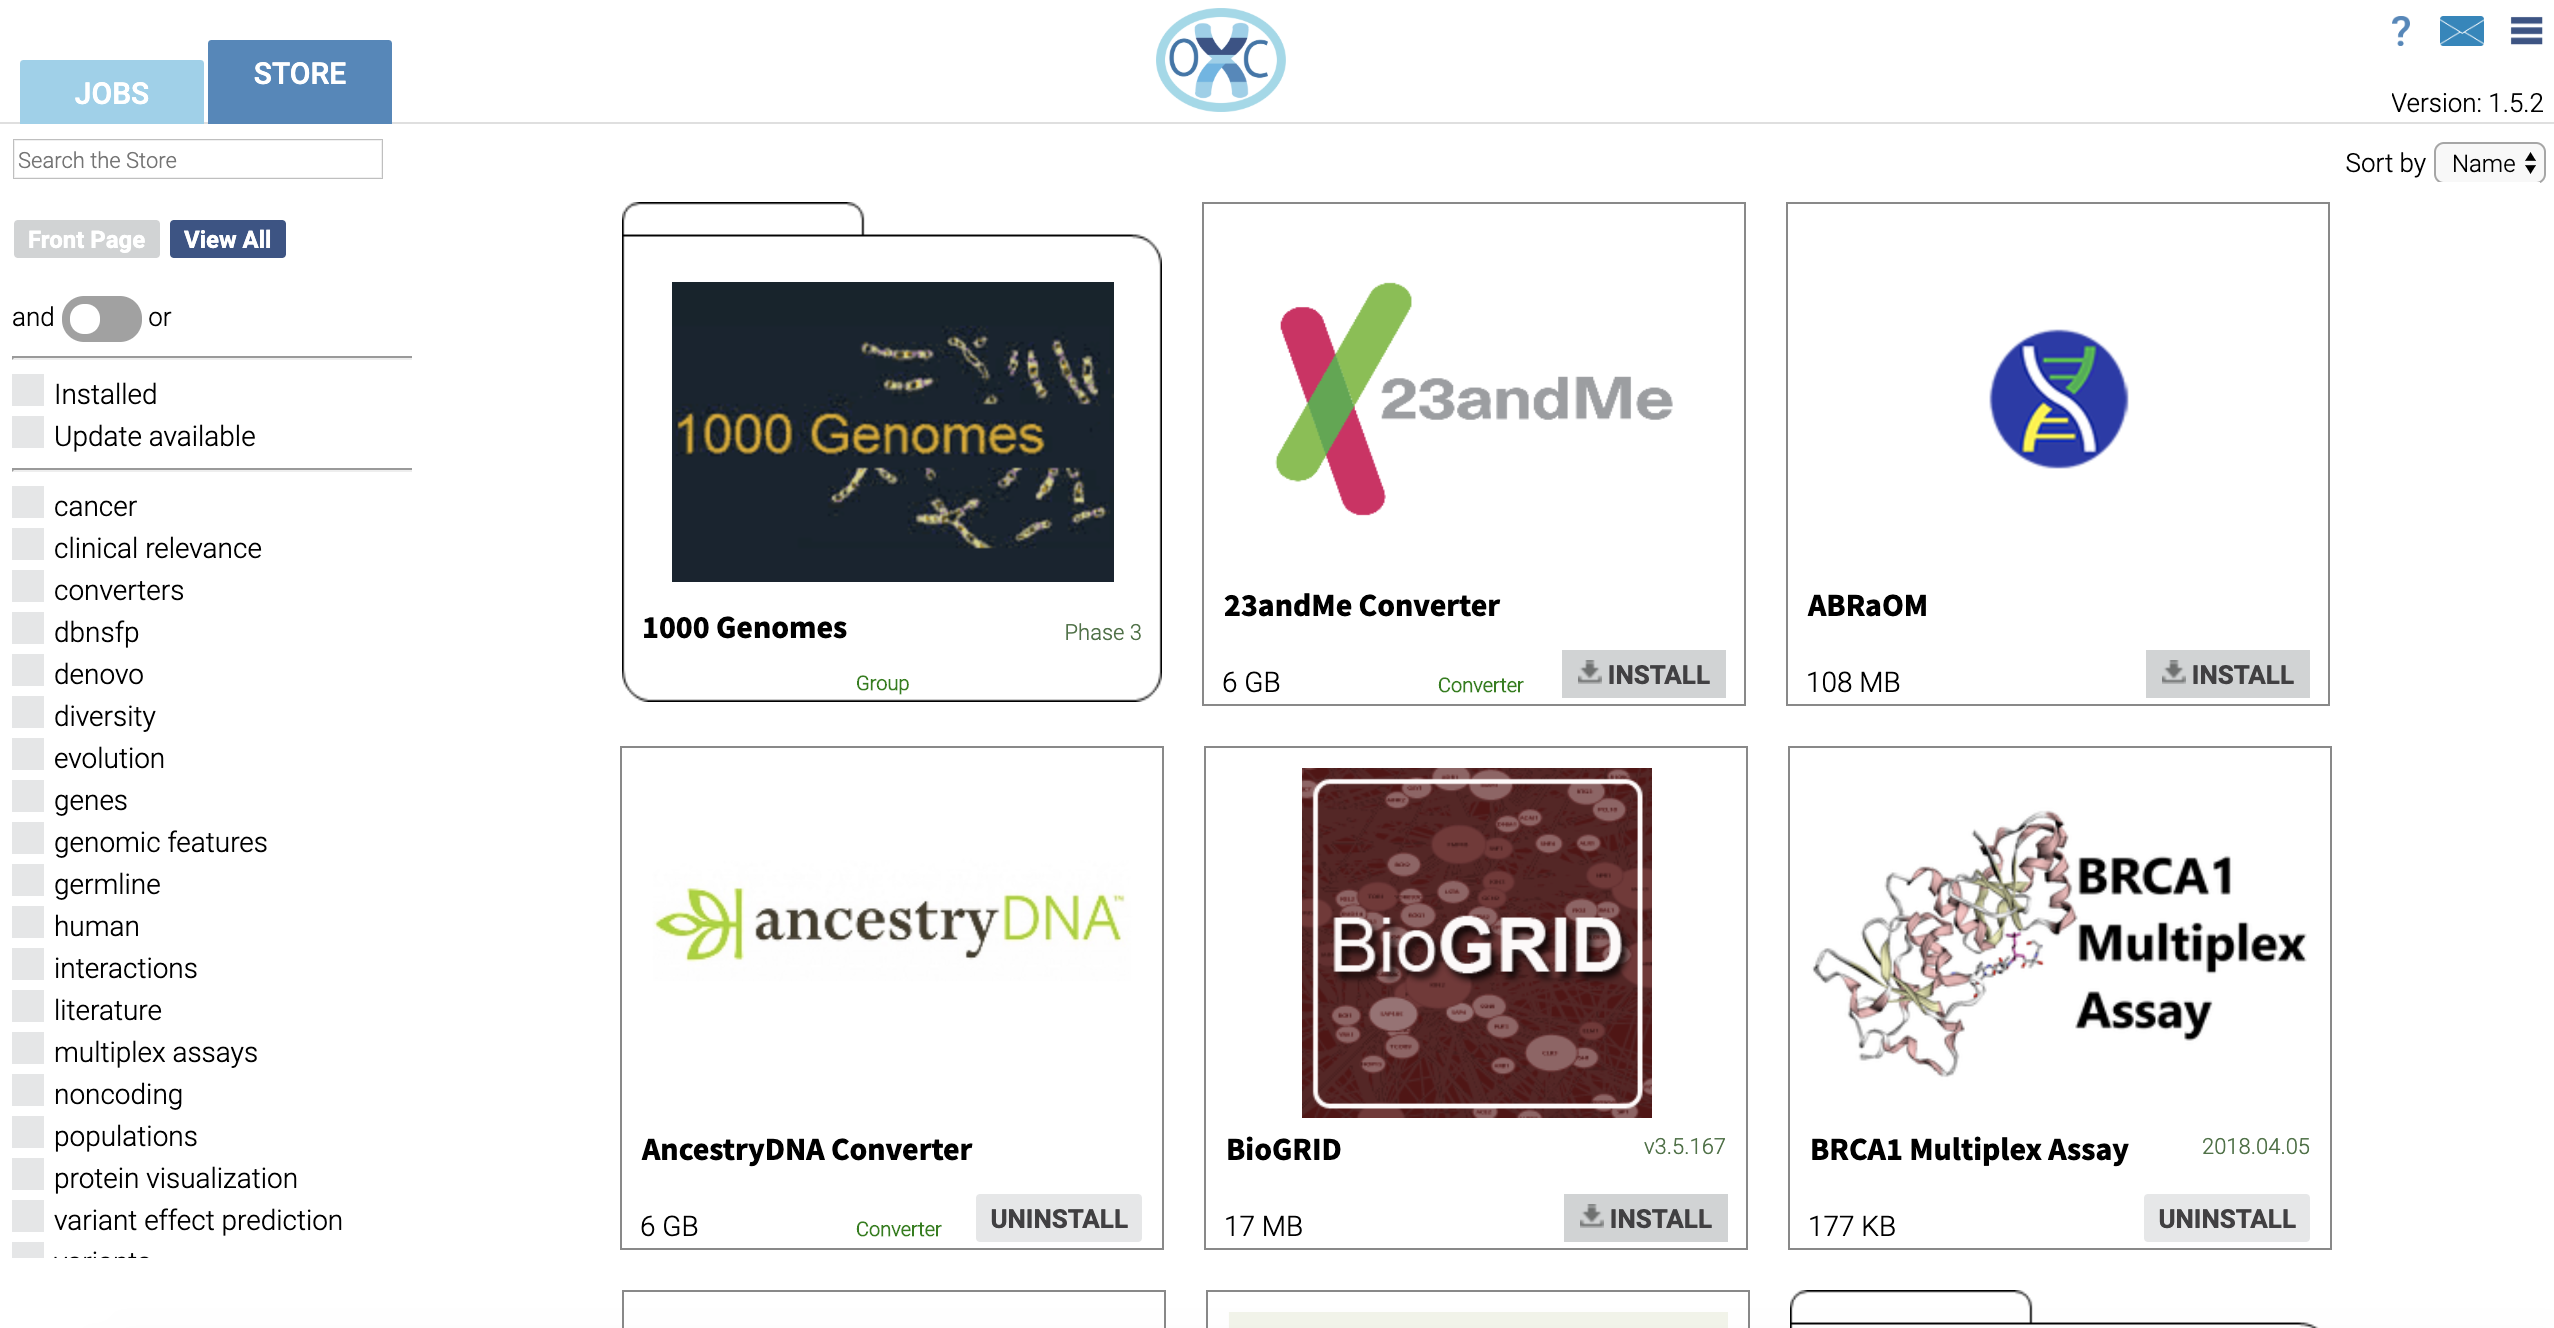
Clicking on one of the panels will open up a detail panel for that module.
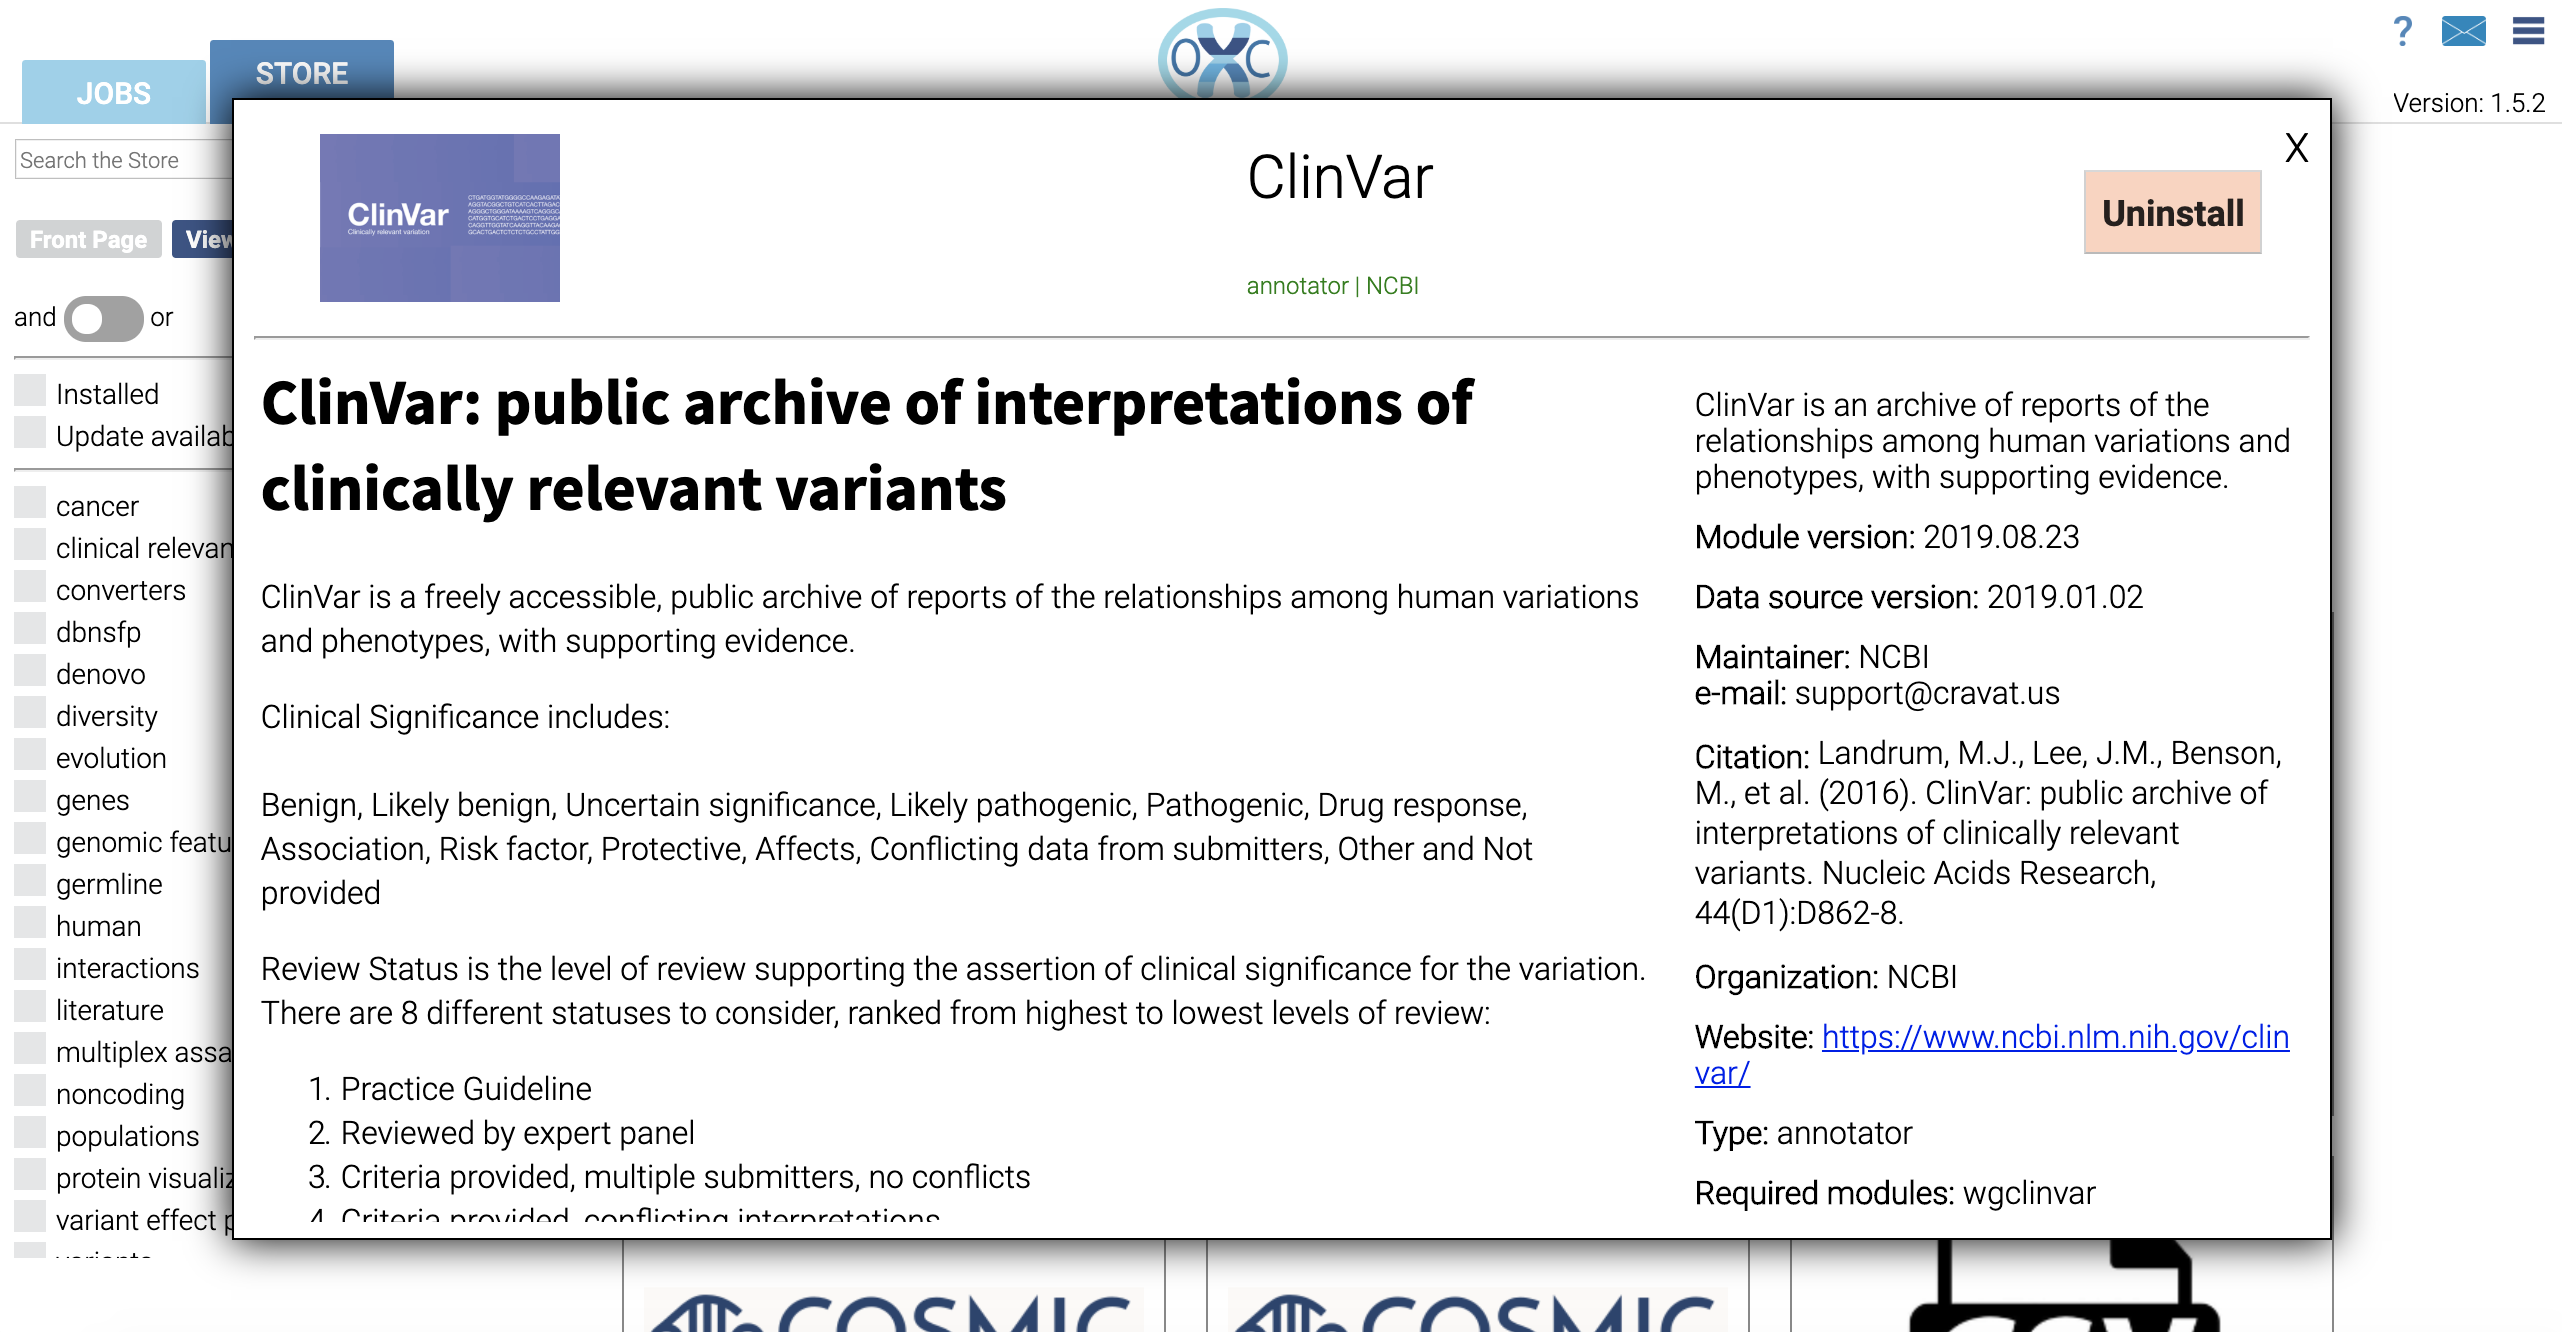
The detail panel has documentation and attribution information submitted by the developer of the module.
The “Install” button on the top right will install that module. Once clicked, the panel can be closed. The install will proceed in the background. Multiple installations can be queued, and will be processed in the order they were clicked. Modules will not install simultaneously. You can see install status at the top of each modules panel in the module overview, or in the top right of a module’s detail panel.
Modules can be deleted, or updated, in a similar way. The “Install” button will automatically change based on the install status of the module.
Using optional file converters: 23andMe and Ancestry
To submit an annotation job using an optional reporter-supported file via the OpenCRAVAT graphical interface: 1) Download and unzip the txt file provided by 23andMe or Ancestry. 2) Navigate to the Jobs tab of OpenCRAVAT. 3) In the Variants section, click the “Choose a file” button and use the file selector to select the unzipped txt file. 4) At the top of the Variants section, select the genome version hg19. 5) Select annotations from the Annotations section. 6) Submit the job by clicking the large orange “Annotate” button on the lower left.
Stopping the web interface
On the terminal where you ran oc gui, press Ctrl-c. On some
operating systems, Ctrl-c may not be well implemented. In that case,
press Ctrl-break. If your computer does not have a break key, usually
there is a key combination that produces the effect of a break key.
Examples of alternative key combinations for ctrl-break are:
Ctrl+Fn+Esc, Ctrl+Fn+B, Ctrl+Fn+F11, Ctrl+Fn+Shift.
System setting
System setting icon is the triple-bar icon at the top right corner of the main page of OpenCRAVAT web interface.
Clicking this icon will open the system setting dialog.
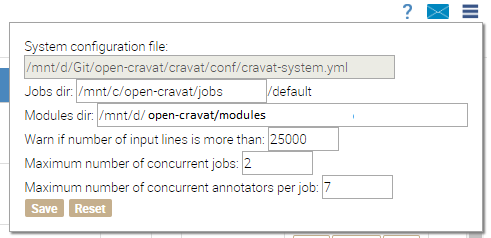
The path to the system configuration file cannot be changed on this dialog. The location of the root jobs directory and that of the modules directory can be entered manually. If your browser supports autocompletion from history, your previous setting values for these locations will show as options, also.
Warn if number of input lines is more than sets the number of input
lines which will trigger a warning popup before submitting a job. This
is to prevent accidentally loading the server with an unusually big job.
The maximum number of concurrently running jobs at each time can be
changed at Maximum number of concurrent jobs.
The maximum number of concurrently running annotators per each job can
be changed at Maximum number of concurrent annotations per job.
These two maximum numbers can affect the performance of your OpenCRAVAT server. The maximum number of processes which can be spawned by the server is the maximum number of concurrent jobs times the maximum number of concurrent annotators per job. So, calibration may be needed for these two values for optimal performance of your OpenCRAVAT server.
Click Save button to save the setting and exit the dialog, or click
Reset to reset the setting values to what they were when the
settings dialog opened.
Changing domain name and port
The default domain name and port of OpenCRAVAT server are localhost
(or 0.0.0.0) and 8060, respectively. If you want to use a different
domain name (for example, a public domain name) and a different port
number, change cravat.yml file in the OpenCRAVAT configuration
folder (to know where your OpenCRAVAT configuration folder is, enter the
below command on the command-line terminal and see the value for
conf_dir).
oc config system
In cravat.yml, enter the new domain name under gui_host and the
new port number under gui_port. An example cravat.yml with these
changes is below:
converter: converter
genemapper: hg38
aggregator: aggregator
reporter: excelreporter
gui_host: www.opencravat.com
gui_port: 80
HTTPS support
OpenCRAVAT supports HTTPS connection on its own. To enable HTTPS for
OpenCRAVAT web interface, create a certificate file in PEM
format for your
OpenCRAVAT web interface domain, name the certificate file as
cert.pem, and put it in the OpenCRAVAT configuration folder. To know
where your OpenCRAVAT configuration folder is, run the following command
on the command line terminal of your OS:
oc config system
conf_dir is the OpenCRAVAT configuration folder.